Hi all,
Here is a step by step tutorial showing you how to achieve a painterly effect by combining two different FotoSketcher filters.
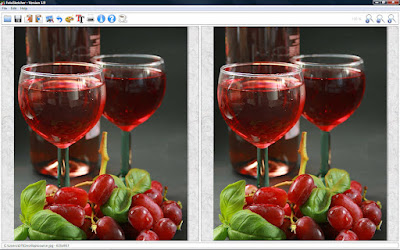
Step 1: Open your source image (keyboard shortcut
CTRL+O) - You can resize your image if you wish (keyboard shortcut
CTRL+R)
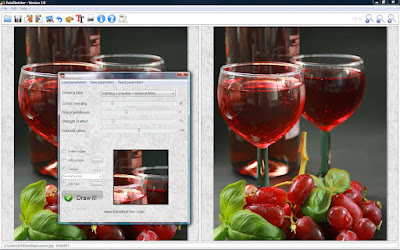
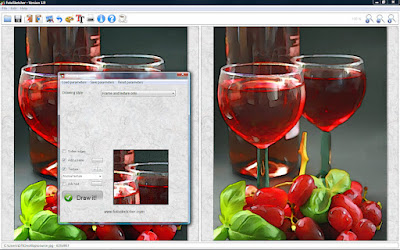
Step 2:
Press F10 to bring up the drawing parameters screen and choose the "Painting 3" drawing style (with the values listed in the following screenshot). Make sure you deselect "Soften edges", "Add a frame" and "Texture". Then click on the
"Draw It!" button.
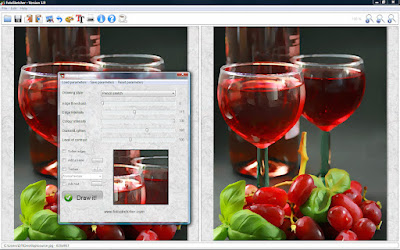
Step 3: Once the rendering is done,
press F12 (to use the resulting image as your new source image). Then choose the
"Pencil sketch" effect and use a value of 0 for "Edge threshold" (drag the corresponding cursor all the way to the left).
This is very important!Then click on the
"Draw It!" button.
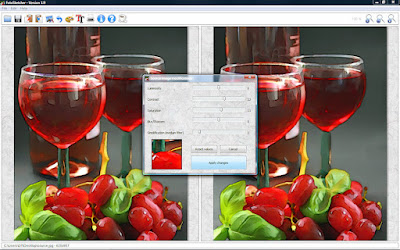
Step 4: Once the rendering is done,
press F12 again (to use the resulting image as your new source image). Then
press F9 to modify source image and choose the parameters shown in the following screenshot). Then click on the
"Apply changes" button.
Step 5: Now add a texture and a frame, by
pressing F10 and choosing the "Frame and texture only" drawing style. Don't forget to tick the "Add a frame" and "Texture" boxes as shown in the screenshot below. Then click on the
"Draw It!" button and finally save your work of art (keyboard shortcut
CTRL+S).
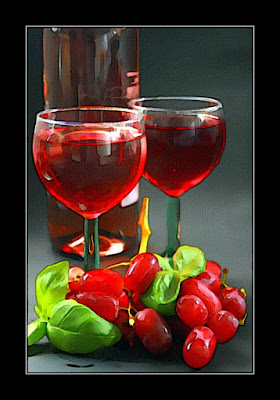
And voilà!!!
I hope this tutorial was useful to you.
Note that on some images, the same combination of effects can give a nice cartoony style to your pictures.
Best regards,
David
P.S. The source image I have used for this tutorial was found on Stock Exchange (
http://www.sxc.hu/) , a great repository for free images. Credits and thanks to the original author of the photograph (Steve Woods).
 Photo credit : stock.xchng (thanks to author Mike Korn).


