Step 1:
Open a photo and apply your first effect (here Cartoon 1).

Step 2:
Then copy the resulting image to the clipboard (either by right-clicking on the drawing and choosing 'Copy drawing to clipboard', or by pressing CTRL+C or by clicking on the third icon in the toolbar).

Step 3:
Now apply your second filter (here Painting 6 - oil painting, with increased brushstrokes intensity).
Once the painting is finished, paste the previous cartoon image from the clipboard (either by pressing CTRL+V or right-clicking on the first image and choosing 'paste image from clipboard' or click on the fourth icon in the toolbar, as shown here).

Step 4:
The Cartoon image you had created in step 1 is pasted in both panes. Your oil painting has disappeared, but no panic, this is normal.

Step 5:
Just click on the undo icon (as shown) or press CTRL+Z.

Step 6:
Now the cartoon image in on the left and the oil painting is on the right. The final step is to choose the 'Merge source and result images' effect and voila!

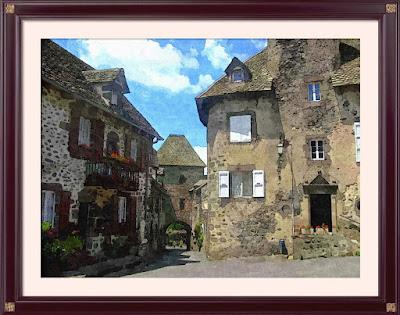
The result:
With a frame and texture added.
 I hope you enjoyed this tutorial!
Best regards,
David
14 comments:
Merci David !
Je n'avais pas pensé à cette façon de procéder... Merci pour le truc !
Tu es le bienvenu, Pierre ;-)
j'ai la dernière version 2 que je trouve superbe,merci pour le tuto
michel
Merci Michel. A bientôt !
Bonjour David,
Serait-il possible que tu nous montres un exemple d'utilisation du "Pinceau personnalisé" ?
Par ex., quelle taille peut avoir le pinceau (en pixels) ? Quelle sorte d'image choisir ? Le pinceau créé doit-il être en JPG ou autre ?
Merci !
I love Foto Sketcher its sooo better then the paid ones you get I wanted to know are you going to release any beta versions for the next release or full release I love current one 2.0
one suggestion for you to improve it it would like to have more effects added and options
Bonjour Pierre,
Oui, c'est une bonne idée, je vais faire un post sur un exemple d'utilisation de pinceau personnalisé (qui peut être un fichier jpg, bmp ou png). Le pinceau doit être sur fond blanc (les pixels noirs sont opaques, les pixels plus ou moins gris sont transparents).
Thanks Zakir, I'm glad that you like the new version of FotoSketcher :-) I'm currently working on a new effect, but it's early days yet. I'll post on this blog when a beta version is ready.
David,
Just found your wonderful program and am so very impressed and grateful. You have done an awesome job with this program, and you are so generous to share it for free. What a great guy you must be. Again, sending you sincere gratitude for this wonderful program. Best, Curt
Hi Curt,
You're most welcome. I'm glad that you like FotoSketcher :-)
Hello david is there by any chance you will add more custom brushes in future Im soo addicted to foto sketcher
Hi Zakir,
Yes I will probably add some custom brushes on this blog for users to download. Stay tuned ;-)
Merci David for your free Foto retouche program I have just started and I enjoy it a lot. Now expecially these multiple effects are great! Thanks. The only thing I would like to ask you or others if it is normal that it goes slowly to go through the process of using the different effects or is it just about me and my PC ?
Hi Cristina,
Having a fast PC can certainly help, but on larger images, some of the effects can take a long time. A few of the algorithms are very computer intensive, especially the Oil Pastel Sketch and Painting 7 (brushstrokes) filters.
So it is safe to say that your PC is probably not at fault.
Post a Comment